How To Create A Seamless Pattern In Photoshop

Recently I had the pleasure of creating a fun background pattern for 60East Technologies' new website. I stumbled across a techique for making a seamless repeating pattern and it went really well! So I deconstructed the pattern I made (from quirky, "techy", hand-drawn elements from 60East's suggestions) and reconstructed it for the purposes of this tutorial. If you have Photoshop, follow along it's easy!
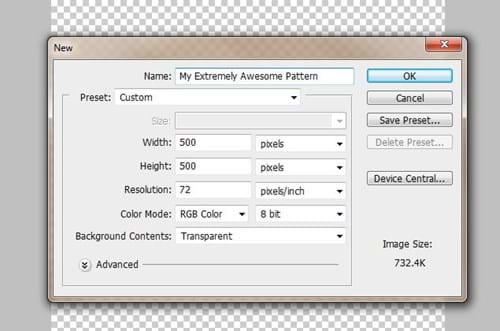
1. Create a new square document with transparent background. 500px by 500px is my example.
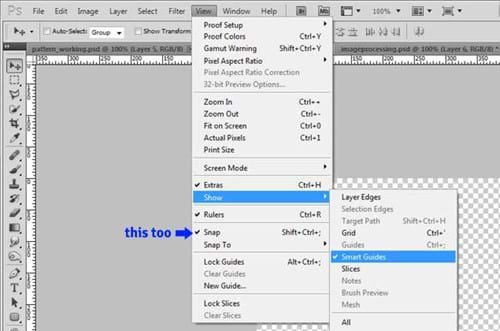
2. Turn on smart guides if not already
This will make elements snap and guides appear at certain alignments.
in the top menu, find View / Show / Smart Guides
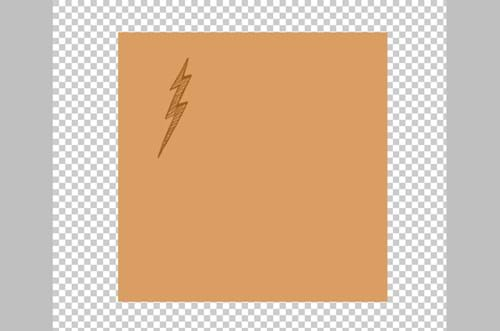
3. Create a new layer called "square".
On your new layer, using the rectangle marquee tool (M), hold shift and drag to make a perfect square in the middle leaving some space around the edges. It doesn't have to be exactly in the middle, there just has to be some space around the edges.
Pick a nice foreground color. Extra points if it's a soft tomato-y red :)
Fill the square with your foreground color. alt + backspace is my favorite method.
4. Place or draw your first element on a new layer above the square.
You can import image files, Illustrator vector graphics, or simply draw something right there
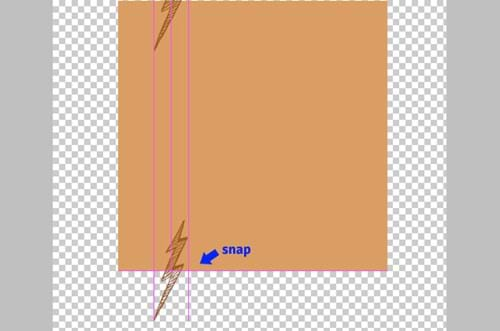
5. Snap the element to the square
Drag the first element slowly towards one of the edges of the square using the Move Tool(V), and look for the "snap" to the center of the edge. You'll also see the pink guide line show up.
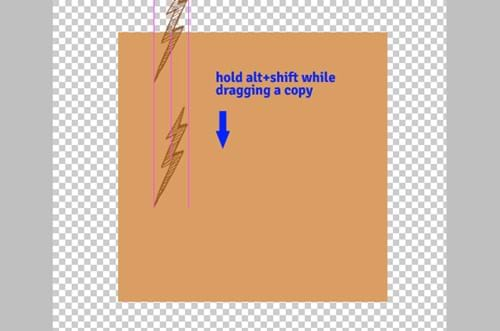
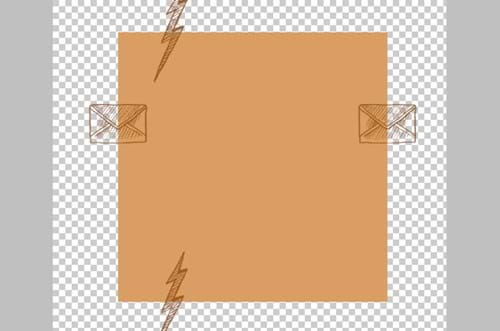
6. Duplicate the first element
Using the Move Tool (V) Hold Alt down while dragging a copy of the first element, also holding down Shift to keep it straight. That's Alt + SHIFT + Drag. Move to the opposite side until it snaps to the center of the edge.
7. Repeat this process for another element on the other sides.
Grab a different element and do the other side
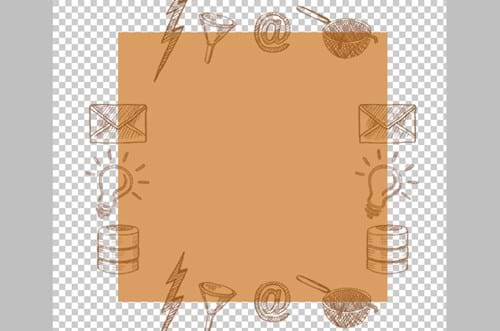
8. Repeat the process until the edges are evenly covered.
Here's where the real magic happens in the seamless nature of your pattern. The more elements that bleed off the edge, the more integrated your pattern will look when tiled.
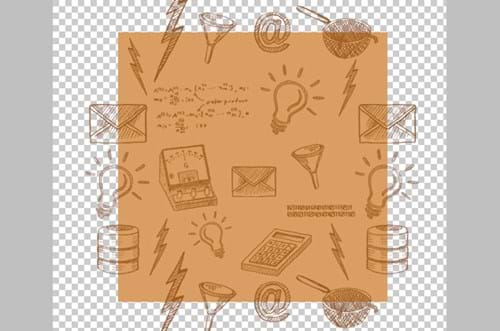
9. Fill the inside
Import or create more elements filling the interior of the square as you like. Play with size and rotation to give your pattern variety.
10. Select the Square
Ctrl + click the layer with the square to select it

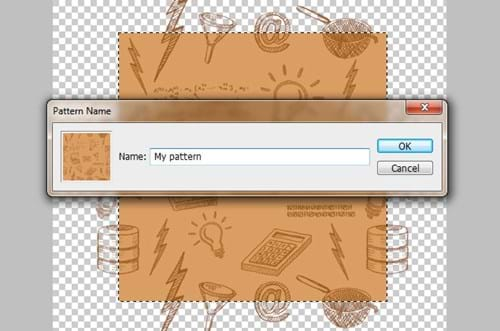
11. Define the Pattern
Go Edit / Define Pattern and choose a name for it.
12. Try out your new pattern!
Create a new document any size you like. Use the Paint Bucket tool (G) and choose the "Pattern" option in the top toolbar. Find your saved pattern in the list, select it, then click the canvas to fill with your new pattern!

I hope you found this tutorial useful! I know I'll be using this technique again, coming up with new and interesting patterns.
If you have any questions please ask!