Headless on Umbraco .NET Core Part 2: Setup Umbraco .NET Core Back-end on Azure
Welcome to the second part of our series on "How To Setup An Umbraco .NET Core Headless CMS Using Gridsome and Vue.js With Automated Deployment"!
This post is focused on the back-end of the Headless architecture. The back-end is where the website content is edited using the Umbraco Content Management System (CMS). We walk through the setup of the Umbraco back-end, the Azure SQL database to store the content, and how to host it on an Azure Web App.
Create Azure Resources
![]()
The steps below assume that you have an Azure Portal account setup and a Resource Group ready that you can add Resources to. If you don't have an Azure Account, you can sign up for a free 12 month trial here: Create your Azure free account today.
Create SQL Database
- Add a new Azure resource in your Resource Group created in Part 1 of this series
- Select SQL Database as the resource type
- Give the database a meaningful name
- Create a new database server, if needed, and make sure to remember the username and password you provide here
- Choose the database size (the Compute + storage option), you can use any size, but sizes below Standard with 50 DTUs (S2) will cause the Umbraco back-office to be noticably slow
- Click "Next: Networking >"
- For the "Connectivity method" option under "Network Connectivity", choose the "Public endpoint" option, and then set both options under "Firewall rules" to "Yes". If the "Firewall rules" section is greyed out, ignore this step and instead setup the firewall in step 12 below.
- Click "Review + create", then click "Create"
- Once the deployment has completed, click on "Go to resource"
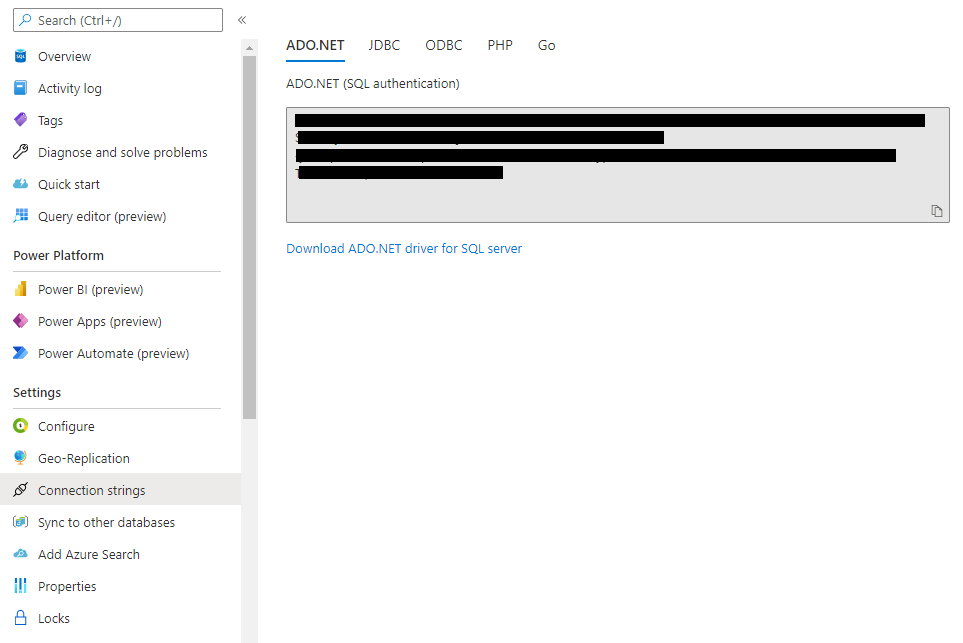
- Go to "Connection strings" on the left side, or click on "Show database connection strings" on the right side of the overview screen
- Note down the ADO.NET connection string
- If the "Firewall rules" section was greyed out in step 7 above, you'll need to setup the firewall now. Otherwise, skip steps 12-17 and continue with step 18 below.
- Go to "Overview" on the left side, then click on the "Server name" value on the right side
- On the right side of the server Overview page, click "Show firewall settings", or click "Firewalls and Virtual Networks" on the left side
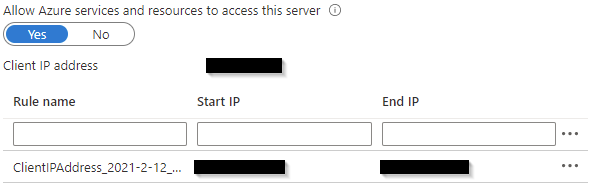
- Make sure the "Allow Azure services and resources to access this server" slider is set to Yes
- Add a rule to allow your local IP access to the server
- Click Save at the top
- Open SQL Server Management Studio, and connect to your server
- Open a new query window, make sure you are connected to master, then execute the following command (providing your own password):
CREATE LOGIN umbracoUser WITH password='{YourPasswordHere}'; - Change to your database, and then execute the following commands:
CREATE USER umbracoUser FROM LOGIN umbracoUser;
EXEC sp_addrolemember 'db_owner', 'umbracoUser';
Create AppService on Linux
- Log in to the Azure Portal at https://portal.azure.com
- Click on the "Create a Resource" button
- Search for and select the Web App resource type
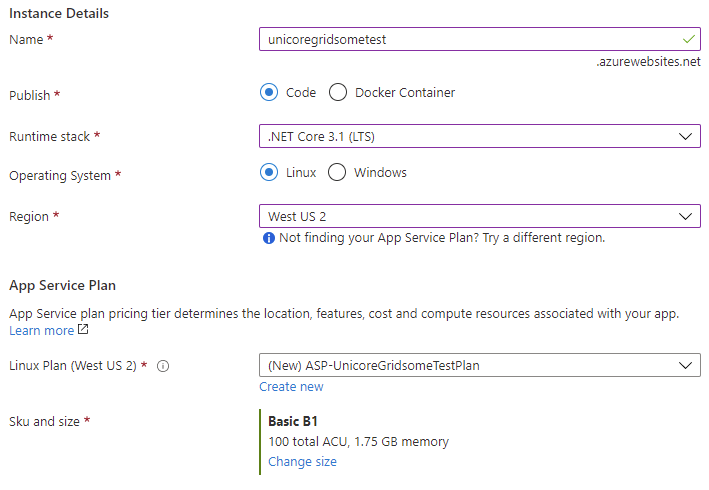
- Set the "Runtime stack" to .NET Core 3.1
- Set the "Operating System" to Linux
- Set the other options as you like, such as changing the App Service size to a smaller Dev/Test size, then click "Review + create", then click "Create"
- Once the resource is created, click on the "Go to resource" button
- Go to Configuration on the left side
- Click on "+ New connection string"
- Set Name to umbracoDbDSN
- Set the Value to the ADO.NET connection string noted above, with a few changes. Specifically, change the User Id= value to umbracoUser, and change the Password= value to the password you chose in step 13 above
- Set the Type to SQLAzure, then click "OK"
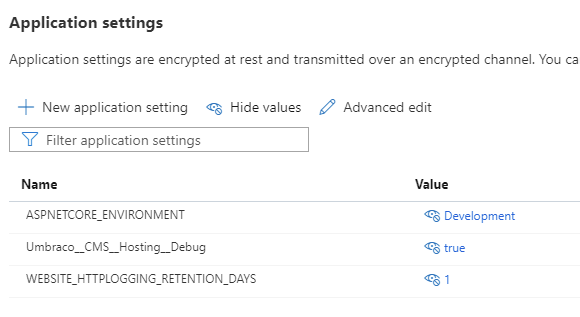
- Add two new application settings, one called ASPNETCORE_ENVIRONMENT set to Development and one called Umbraco__CMS__Hosting__Debug set to true
- Click "Save" at the top, and then "Continue" to restart
- Go to "Deployment Center" on the left side
- Select "FTPS credentials" at the top
- Note the "FTPS Endpoint" value, and the "Username" and "Password" values under Application Scope, you will need these later
- Click on "Overview" on the left
- Note the URL value on the right, as you will navigate to this URL multiple times throughout this tutorial. We will refer to this URL throughout the document as the "Backend URL".
Setup Backend
Create Git Repository
- Add a new Git repository in your service provider of choice (GitHub, Bitbucket, Azure DevOps, etc.)
- Clone the repository locally to a new folder, e.g. C:\src\UnicoreGridsome\Backend
- Create a .gitignore file in the root directory with the following contents:
.vs/
App_Data/
bin/
dist/
node_modules/
obj/
*.user
*.suo
umbraco/
wwwroot/
config/ - Commit that change, and push it up to your remote repository
Create Umbraco Project
Follow the instructions at https://umbraco.com/blog/net-core-alpha-release/
- Install the .NET Core 3.1 SDK - https://dotnet.microsoft.com/download/dotnet/3.1
- Open a command prompt in the Backend repository directory, and execute the following:
dotnet nuget add source "https://www.myget.org/F/umbracoprereleases/api/v3/index.json" -n "Umbraco Prereleases"
dotnet new -i Umbraco.Templates::0.5.0-alpha002
dotnet new umbraco -n UnicoreDemo - Commit the changes and push them up to your remote repository
- Open a command prompt in the newly created UnicoreDemo directory, and execute the following:
dotnet run
- Once it gets to the point that it displays the URLs to connect at, open a browser and navigate to http://localhost:5000
- This should bring up the Install Umbraco wizard
- Fill out your name, email, and a password, then click "Next"
- Choose the database type of "Microsoft SQL Azure" and specify the Azure Database Server name and
- Azure Database name you setup above
- For the Login, set this to umbracoUser and the password is the one you set in the SQL script you executed above after setting up the database
- Click Continue
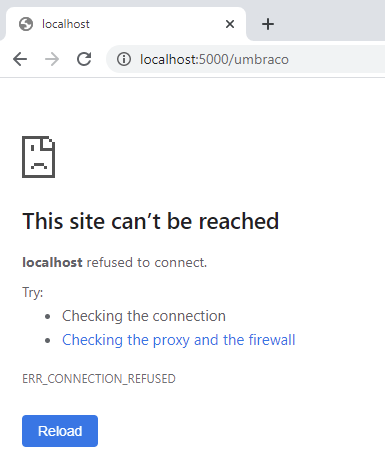
- After a minute or two, it should bring you to an error page saying the site cannot be reached. This is normal for the local development and isn't anything to be concerned with. The Umbraco install process has to restart the server at the end, and because we are running from the command line the restart process simply stops the server and is not able to start it again
- Repeat step 4 above to start the website, and navigate to http://localhost:5000/umbraco
- Login using the credentials you setup in step 7 above, and verify that the back-office comes up correctly
- Press Ctrl-C in your command prompt to stop the website
- Commit the changes and push them up to your remote repository
Publish and Review
With the site up and running locally now, you can publish it up to Azure and see your back-office working there.
- Open a command prompt in the UnicoreDemo directory, and execute this command:
dotnet publish -o dist
- Open an FTPS client, such as FileZilla, and connect to the FTPS server from the Azure Web App deployment center above ("Create AppService on Linux", Step 17)
- Delete the existing hostingstart.html file that is in the /site/wwwroot directory
- Upload the contents of the UnicoreDemo/dist directory to the /site/wwwroot directory
- Create a /site/wwwroot/umbraco directory on the server
- Upload the contents of the UnicoreDemo/umbraco directory to the /site/wwwroot/umbraco directory
- Navigate to your Backend URL in a browser, to the /umbraco page, and you should be able to log into the back-office
With this setup, you have everything you need for the back-end content management and editing of the headless website. In addition, you have it hosted on Azure and ready to connect to your front-end from Step 1!
Next up will be:
Headless on Umbraco .NET Core Part 3: Setup GraphQL API and Connect Back-end and Front-end
Let us know if you have any questions or issues in the comments below!