Umbraco Training Day 3
Today was the first day of Umbraco Training Level 2. We built upon the foundation which was established from Level 1. We learned about debugging your Umbraco files, Using UserControls to create new content, Members, Umbraco's Restful API called Base, and Relations.
Debugging
The first thing that we discussed was how to debug your Umbraco files. It is possible to debug your .Net UserControls, Razor Macros and XSLT Macros. The debugging of XSLT macro is not as good as the C# debugger, but it is better than nothing.
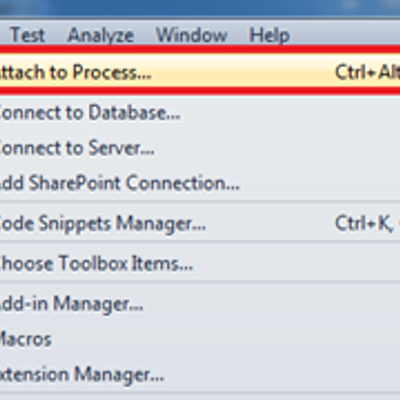
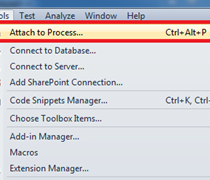
To debug your Umbraco files you need to have your project in Visual Studios. Then the next step is to go to Tools and click on Attach to Process.
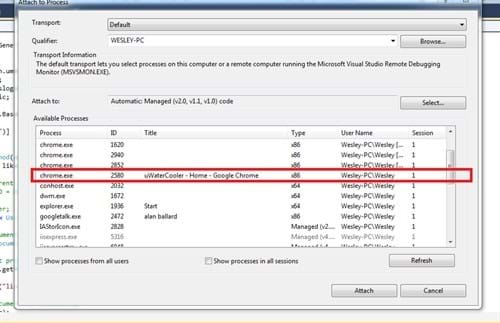
Then you locate the website you wish to debug and select and and then click on the Attach button.
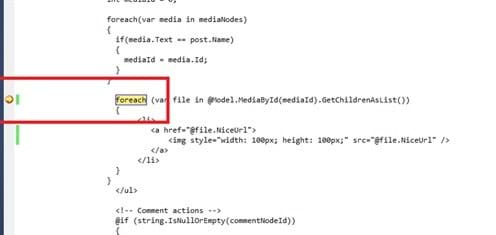
The next step is to set a break point in any C#, XSLT or Razor file and go to whereever you are using that file. Then whammo you are debugging your Umbraco macros or usercontrols.
Creating Content
Now lets say you want to allow users to create their own content. What kind of content could a user create you ask? Lets say you want to be able to update your website with somekind of status, or comment on a blog post Well you can do this using a usercontrol.
To create content you will need to grab the correct node ID. Assuming you modifying your current page then that would be done by Node.getCurrentNodeId(), or you can use macro parameters to to get the correct node id.
The Macro Parameters are very simple in UserControls, just add the property in the class you want. It will look something like public int ParentId { get; set; } depending on the property of course. Then you will head over to the Umbraco side and find your macro and click on the Browse Properties button.

It will open up a screen with a guess of which parameters you want to add to your macro, select it and then hit okay. It is smart to check if it guessed the parameters correctly, click on the parameter tab to check them out.
After you have the parameter on your macro you will be able to add the node id whenever you add the macro.
Next you have to, get the DocumentType. This is done by DocumentType.GetByAlias("Alias Name").
After that you need to create the new document. This is done by Document.MakeNew().
Then you can add the necessary values to the document by calling document.getProperty("Property Name").Value = "Whatever Value you want". This is also how you add to an already created document.
Then Publish your document, and always make sure to UpdateDocumentCache. If you don't update the Umbraco Document Cache than the user will have to reload the cache themselves by refreshing the page. It is the best to call this so the user can see what they just created.
Members
Having members for your umbraco site is a great idea. It adds protection to your website, gives your visitors an identify, allows for support of different roles, allows for custom navigation based on member as well as many other things.
Memeber Groups allows for you to add members to specific groups. Lets say you want to know if your members have completed the optional part of a registration process. Well you can add them to a special Members Group called Completed if they have. You can check if the member is a part of that Member Group from then on and if so you can do extra things for them.
Member Types will allow you to create a system of differentiation between your members. You can have the Super Duper Special members who get access to Super Duper Special navigation and the Boring Standard member who can only see the boring content of your site.
Another thing that is nice about members is that accessing and modifying a member happens almost exaclty the same as accessing and modifying documents or document types. The only difference instead of Document.Function() it will be Member.Function().
Restful API Base
Umbraco has a RESTful (REpresentational State Transfer) known as Base. Base maps URL's to static .NET methods. You can use jQuery ajax calls to reach those methods also. This allows for you to call your C# methods from your client side.
The URLs are case sensitive and so you need to watch out what you name your class, and methods.
 $.getJSON("/base/likes/likestatus/" + statusId, function (data) {

           $("#likes").html(data);

        })
The first part of the URL in $.getJSON is necessary for Base to work correctly.
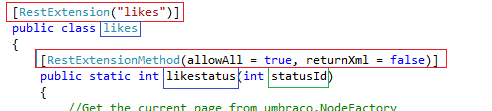
Then the second part URL "likes" is matched up either the class name or the decoration. So public class likes or [RestExtension("likes")]. You do not need to add in [RestExtension("likes")] if you are happy with the class name. If you have a classname that you don't like then you can override the class name by adding your own inside of [RestExtension("SecondPartOfTheUrl")].
For the third part of the URL than you need to have that match up with the name of the method.
Lastly the name of the parameters is unimportant, since in our case statusId is going to turn into some magic number it doesn't match anyways.
You are probably wondering about the [RestExtensionMethod()] decoration. This is to add a layer of protection to your methods, so someone is not able to call methods they shouldn't be able to from the url.
- allowAll, which will be a boolean value which will allow everyone, or only those in your allowed Groups, or Types
- allowGroup, which will be a comma seperated list of member groups.
- allowType, which will be a comma seperated list of member types.
- returnXML, which will be a boolean value determining if the return type should be an XML string, or a regular string
Relations
There are times in your website where you want to connect two Umbraco ojbects. Relations is the way to do this! Lets consider a like feature on user created comments. How do you make it to where a user can only like a comment once?
For relations to work your objects must have a nodeID and they must be a registered type in Umbraco. To register a relation you must add it into your Database specifying the two objects which you want related.
To check for a relation you can do something like this
RelationType relationType = RelationType.GetByAlias("RelationAlias")
if(!Relation.IsRelated(firstRelationId, secondRelationId, relationType))
The hardest part is setting up the relationship in the first place, but as soon as that is done the rest is easy.
That is what I learned on my third day of Umbraco training! RESTful Base is pretty awesome if you ask me!